How to Mount and Aim Bike Lights Without Dazzling Others
Share
A bright bike light only works well when it is mounted securely, visible to other road users and aimed at the road rather than into oncoming eyes. This guide covers front-light angle, rear-light placement, helmet mounting and a simple pre-ride check.
Local rules differ. Check the bicycle-lighting requirements where you ride. Some locations regulate light color, flashing modes, approval marks, mounting height or when lights must be used.
Quick bike light setup
- Use a white light facing forward and a red light facing rearward.
- Mount each light so bags, clothing, racks and cables do not block it.
- Tighten the mount enough to resist bumps and normal vibration.
- Aim the front beam toward the road and avoid dazzling oncoming traffic.
- Keep the rear light close to vertical and visible from behind.
- Charge the lights and test every mode before leaving.
How to mount a front bike light
A handlebar is the most predictable location for a primary bike headlight. Choose a section that keeps the lens clear of brake hoses, cables, bags, computers and your hands.
- Clean the mounting area.
- Center the bracket or place it slightly off-center where controls allow.
- Secure the strap or clamp according to the product instructions.
- Confirm the light cannot rotate downward or sideways under light hand pressure.
- Turn the handlebar fully left and right to check cable and frame clearance.
How to aim a bike headlight
Start with the beam tilted slightly downward so its brightest area lands on the road ahead rather than at eye level. There is no universal angle that works for every beam pattern, mounting height and speed.
Wall-check method
- Place the bike on level ground facing a wall.
- Measure or note the center height of the headlight.
- Stand several bike lengths back.
- Switch on the normal road mode.
- Aim the main beam or cutoff below the headlight-center height marked on the wall.
- Take a short test ride and fine-tune for useful road coverage without glare.
A shaped or cutoff beam should remain correctly oriented; rotating it can send light above the intended cutoff. German StVZO rules, for example, require bicycle headlights to be adjusted so they do not dazzle other road users.
Steady, flashing and high-output modes
Use a steady front beam when you need to see the road continuously. Flashing rules vary by location, and some jurisdictions restrict flashing front headlights. High-output or high-beam modes can create glare in traffic, so switch to a lower or shaped road beam when other people are approaching.
For a clearer comparison of brightness terms, read our bike light lumens vs. lux guide.
Where to mount a rear bike light
A rear light should face backward, remain close to vertical and stay unobstructed. Common positions include the seatpost, saddle bag loop, rear rack or a compatible helmet mount.
- Check that a jacket, backpack or saddle bag does not cover the lens.
- Do not aim the light sharply downward toward the tire.
- Keep straps and loose fabric away from the wheel.
- Confirm visibility when the bike is loaded as it will be ridden.
- If one position may be blocked, consider a second independent rear light where lawful.
Helmet-mounted lights
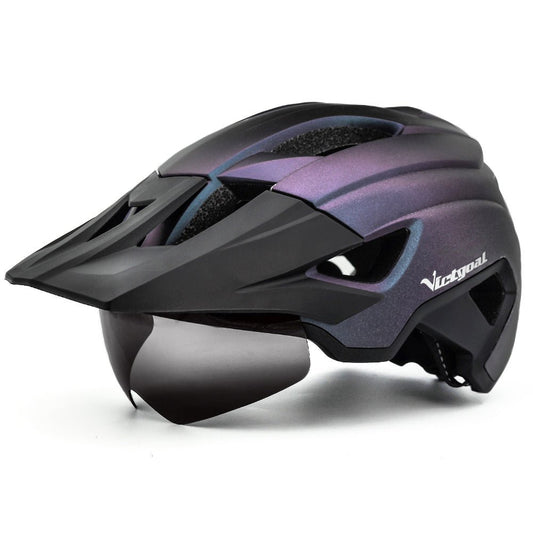
A helmet light can follow your line of sight and supplement a handlebar beam on dark trails or poorly lit routes. It also moves whenever you turn your head, so use it carefully around other riders and drivers.
- Use only a helmet-compatible mount intended for the product.
- Do not drill, cut or modify the helmet shell.
- Keep the light and cable from interfering with the helmet retention system.
- Check added weight and stability before a long ride.
- A helmet light should supplement, not automatically replace, legally required bike-mounted lighting.
Front and rear light combinations
A front and rear bike light set provides two different functions: the front light helps illuminate the route and makes the bicycle visible from ahead, while the rear light helps others see the rider from behind.
| Use | Recommended starting setup |
|---|---|
| Lit urban commute | Steady or locally permitted attention mode, downward-aimed front light, visible red rear light |
| Unlit road | Steady front beam with enough reach for speed, plus a steady or permitted rear mode |
| Trail riding | Handlebar beam plus optional helmet light, adjusted when approaching others |
| Mixed day and dusk | Charged front and rear lights fitted before visibility drops |
Battery and weather checks
- Charge both lights before an important ride.
- Do not assume the highest mode will last for the entire route.
- Carry a backup for long or remote night rides.
- Close charging-port covers fully before riding.
- Follow the stated water-resistance limits; do not interpret water resistance as permission for submersion or pressure washing.
- Dry lights and mounts after wet rides before charging.
Five-minute pre-ride light check
- Turn on the front and rear lights.
- Confirm the colors and modes are appropriate for local rules.
- Push each light gently to test mount security.
- Check the front beam against a wall or road surface.
- Stand behind the loaded bike and confirm the rear light is visible.
- Verify battery indicators and carry a backup when needed.
Frequently asked questions
Should a bike light point straight ahead?
The light body may face forward, but the useful beam should generally be aimed toward the road. The exact setup depends on the beam pattern and mounting height. Avoid aiming the brightest part into other road users' eyes.
How high should a bike headlight be mounted?
Use a secure, unobstructed location permitted by local law and the product instructions. Rules can specify mounting-height ranges; Germany's StVZO, for example, includes defined mounting heights for bicycle lighting.
Can I use only a helmet light?
Do not assume so. Local law may require lights mounted on the bicycle, and a helmet beam moves with your head. A bike-mounted front and rear setup is the more dependable starting point.
Why does my light keep moving on bumps?
The strap may be loose, the mounting surface may be tapered or dirty, or the bracket may not match the bar diameter. Reinstall it according to the instructions and replace damaged mounting parts.
Should the rear light flash?
Flashing rules vary. Choose a mode permitted where you ride and make sure the light remains visible rather than relying on an extremely rapid or distracting pattern.
Build a complete setup with Bike Lights, the Night Ride Kit and our commuter bike safety checklist.
Choose a Light for the Mounting Position
Confirm bar diameter, helmet compatibility, beam shape and runtime before ordering. Recheck the aim after every installation.
- STVZO Front and Rear Bike Light Set, 30 Lux - useful for comparing a road-focused front beam and separate rear light.
- 2-in-1 USB Front and Rear Light - designed for compatible helmet or handlebar positioning.
- USB Rechargeable Bicycle Headlight and Tail Light Set - a conventional bike-mounted pair.
See all Night Riding Bike Lights for more mounting choices.